Showing posts with label photography. Show all posts

Thursday, May 26, 2011

Alternative Gum Bichromate Pigments

5

I've been playing around with gum bichromate a lot. Its such a cool medium with massive potential for experimentation. After the first print I knew I wanted to make a cohesive body of work with it, but there is so many variables to try that I didn't feel right making work with it until I got to know it better. So most of the last 6 months has been directed to figuring out what will and what wont work as a pigment.

I've got 2 recipes ready for sharing after the jump.

Sunday, May 15, 2011

My darkroom

5
My Darkroom is in the basement of the house my friends and I are renting, it occasionally floods after a rainstorm. The set up cost was about 50 USD. The light proofing comes from tinfoil on the windows, and the 'walls' of the darkroom are 3mil contractor plastic. The basement is super gross so after I hung the plastic I cleaned the floor with a vengeance.

Wednesday, March 2, 2011

Poitevin's Direct Positive Process: Part 2

0310010940
I've spent another afternoon in the laboratory trying to get a readable print with Poitevin's process. I posted a plea for help on apug but no luck so far. To advance any further than I have with my efforts I'm going to have to suck it up and buy A Treaty on Photography which will hopefully have some more tips. The failed procedures after the break.

Sunday, February 27, 2011

'Poitevin's Direct Positive'


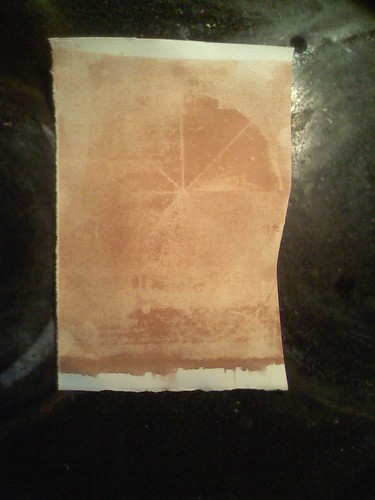
Its a snow day here in maine, and i had the required chemicals around so I just gave the formula found
here a go. The source appears to be similar to this version except at appears to be leaving out the gelatin. After a 30 min exposure and a water development i have something of an image (really just some recognizable dark shapes visible against the staining). My second attempt was with a stoffers step wedge and is found at the start of this post.

Attempt 1: Result Failure
Mix the two ingredients together then brush apply to a gelatin sized printmaking paper (I used bfk white).
1/4 inch cube of artist grade liquid watercolor paint
5ml of sensitizing solution

Sensitizing solution:
5 grams ferric chloride
1.5 citric acid 50 ml water
(remember to add acid to water! I forgot and got an awesome steam puff)

Exposed for 30 minutes with negative and test wedges, then developed in hot running water.

Attempt 2: Result Failure
Make a 5% gelatin solution by adding 1 packet of knox gelatin (about 7 grams) to 100 ml of cold water. Let swell for 15 minutes then add cold water to bring the solution to 150ml water. Bring solution to 140* f and maintain the temperature until all the gelatin is disolved. Add 1/4" cube of pigment to the gelatin and stir until an even mixture is created.
Float/brush apply to paper, then while wet float on the same sensitizing solution found in attempt 1.

Expose with test wedges for 30 minutess and develop in hot running water.


Sunday, October 3, 2010

Test Subjects

pipe

This quarter plate was taken at the beach. I developed the plate emulsion side down, thus the scratches. Its hard to tell which way is up with out a notch guide. I think I might start cutting them into my plate.

When I'm shooting film for tests- content isn't so important. I try to keep it interesting enough so I don't die of boredom processing the test.

During the Exposure

Neighbor house

4x5 photography is supposed to 'slow you down' and to me, it does. I pre-visualize before I set up my tripod, go through the elaborate process of using the camera, then spend an hour re-visualizing the shots while I develop in the dark.

Friday, August 27, 2010

Trash-o-type

Whats with the obsession with "-o-types"?

The above image is what I've been calling a trash-o-type. It is made (or should I say discovered?) when a piece of photosensitive paper is discarded. As the paper sits in the trash it will come into contract with photochemistry residue from all sorts of darkroom related trash. It is 'finished' by a prewash, a fixer bath, then a final wash. After the jump is a narration of the creation process for a typical trash-o-type.

Saturday, May 22, 2010

Cost: Emulsion making


This is the first cost write up out of three which will include emulsion making, making the plate, and developing.

I've been documenting the cost it has taken to get into dry plate photography. After the jump I have broken down the costs in an itemized list. Included in the total is the shipping and Handling costs (but not gas money). If you have access to many of the materials already then the costs described is on the high end.


Wednesday, April 28, 2010

NHIA Student Exhibition 2010

Come visit the New Hampshire Institute of Art and see three of my images on display. I'm really happy to be hanging next to some of the great artists of the future. The exhibition opens May 23.

Thursday, April 22, 2010

Capstone Finished

(Pic is sort of related)
As well as finishing my oil and water project, I was required to write a 'capstone' paper to accompany the photographs. I started with the musings posted on this blog and refined them.

The capstone in PDF format can be found here. Post in the comments if that link breaks. I'm hoping to use google docs to host my pdfs.

Sunday, December 13, 2009

Proffesional Artist Presentation

Finally Finished the semester. Feels really good. Now I can get to work on real projects. After the break there is a video of the presentation I did for class. Note: I edited out the questions at the end and cut to the clapping ;)

Sunday, November 8, 2009

Current work November 8

I have several projects on going at any moment and I thought I'd share one. Everything that follows is a rough draft subject to change or abandonment!

Part 1
I am photographing the interaction of oil and water, and more specifically 'thin film interference'. I was inspired by the beautiful colors found in puddles where oil and water interacted after rainstorms. I would see these moments of color on black asphalt and have to stop whatever I was doing to stare.

Friday, November 6, 2009

Film is expensive

Today I sent out 19 sheets of 4x5 velvia to Color Services in Needham, Mass. The film is 2.50 a sheet and costs 2.65 to process in total 97$. How can that be worth it?

Quality.

I wanted to visted Color Services before committing my film to them. I have been processing my own film throughout collage and I didn't like the idea of giving up that control. I woke up early, got my coffee and set up my tripod behind the coffee shop. I shot a few holders, and then drove down to the lab.